Step 1 Selecting your bagpipe chanter reed
When selecting a reed start with a one that is slightly stronger than is comfortable. This is because a new reed will soon weaken slightly after the break in period and as it absorbs moisture.

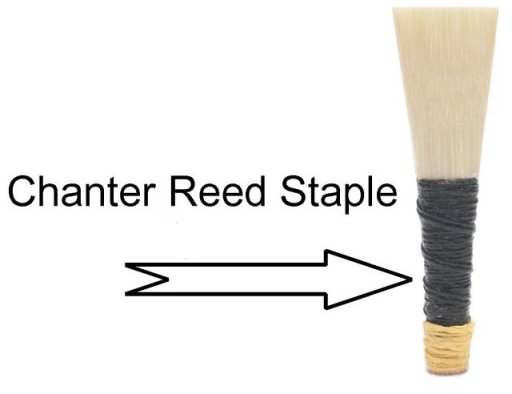
IMPORTANT when adjusting your bagpipe chanter reeds take care NOT to do this by gripping the blades of the reed. You should make ALL adjustments by gripping the staple ONLY
Step 2 Preparing your new bagpipe chanter reed.
Any cane reeds requires a certain amount of moisture in order for it to perform to their best. Without this moisture the top hand notes will tend to be slightly sharp and sound thin. The moisture increases the reeds response and therefore helps to balance out the top hand. In order to introduce a little moisture prior to setting up your chanter it is recommended that you first of all take 5 minutes or so just to blow through the open end of the staple as this, therefore, will partially re-hydrate the reed and better prepare it for initial set up.
Step 3 Fitting the bagpipe chanter reed.
Fit your bagpipe chanter reed into the reed seat and ensuring the seating is secure. You will not get a loose reed stable. Depending on the make of chanter it maybe necessary to add or remove some hemp from around the bottom of the staple. When doing this ensure that no loose ends of hemp are trapped in the open end of the staple and in addition that the bottom edge of the staple has a covering preventing the staple edge from touching the reed seat wall as this gives undesirable overtones.
Step 4 Balancing your bagpipe chanter reed
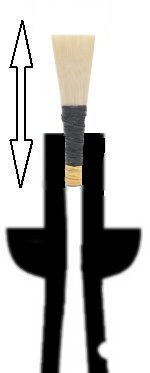
Once seated correctly test your bagpipe chanter reed in order to obtain the correct balance between low A and High A. If top hand notes are too sharp then raise the reed in the seat. If top hand notes are to flat then sink the reed further into the seat.

Step 5 Gentle manipulation to obtain a true scale.
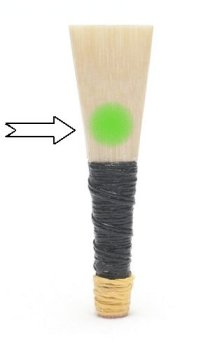
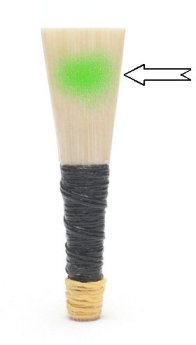
Having obtained the desired balance and pitch, at this stage in the reeds life it is advisable to carry out very gentle manipulations in order to obtain a true scale. A new reed may initially be a little flat particular on C and F. The F may even have a slight double tone. An enlargement of the lips aperture during the drying out stage of its manufacture causes this. It should disappear as the reed is blown in and manipulated gently. A gentle squeeze of the reeds sound box, just above the staple will lift the pitch of these notes and remedy a double tone on the F. For further remedies, see shaving a chanter reed.

Be aware that this gentle squeeze of the sound box will also raise the over all pitch of the reed. Any note that is slightly sharp can be flattened by the application of a little tape over the top of the open hole below the note. See fine-tuning a chanter.
Step 6 Blowing the reeds in
Over the course of the next week or two (depending on the frequency of playing), the reed should be played to break it in. As we have selected a reed that is slightly uncomfortable, and as the reed absorbs its initial moisture content, you may find that it gets slightly stronger and lower in pitch. This is perfectly normal.
To bring the reed back into your comfort zone and to bring it up to pitch apply gentle pressure (enough pressure to make the lips just meet) just above the sound box and hold this for 30 seconds or so.
This will happen more frequently in the first few days of playing

Step 7 Further manipulation… if required
Once your reed has been blown in further manipulation of it can begin IF it is required. Do not try to make a good reed better. By now your reed should be feeling quite comfortable to blow, have a good response and well balanced, with fine-tuning carried out by the application of tape to the chanter holes, if this is the case, leave it alone.
There are no secrets when it comes to manipulating chanter reeds but it is important to be aware that carrying out one operation results in multiple effects. A word of caution… many a good bagpipe chanter reed is destroyed at this stage so be prepared to experiment before your feel for this stage matures.
